

Hello Power Addicts, welcome back to another blog post where I am going to show you a simple way of loading or opening or launching, whatever you may call it, a specific screen of any canvas app which is embedded in iFrame component in a Power Page based on user’s action in the web page.
Table of Contents
Pre-requisites
A basic understanding of Canvas app and Power Pages is required along with HTML and JS.
Create a canvas app with multiple screens
I have created a canvas app named “My Hospital App” and added 3 screens in it.
- Dashboard Screen – This screen will display all the appointments I have booked.
- Appointment Detail Screen – This screen will display details of a selected appointment in the dashboard.
- Book Appointment – This screen will allow us to book a new appointment.
**I am not going to discuss how the controls in the screen are configured as it is out of context for this post.


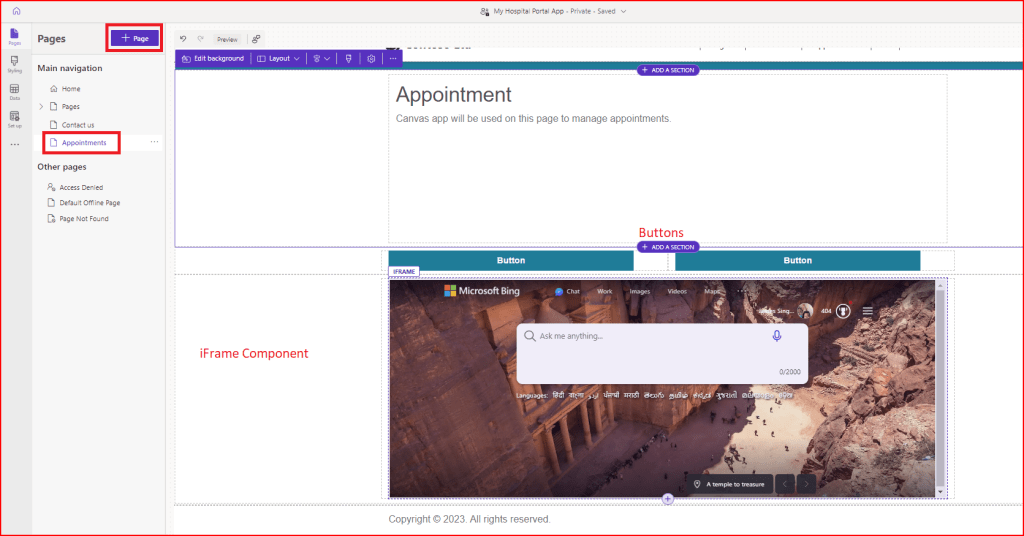
Create a web page containing an iFrame component
I have added a new page “Appointments” in Power Page app and included an iFrame component. I have also added 2 buttons. Save and close the web page.
Edit the web page using Portal Management app
Lets customize the web page a little bit using the Portal Management app. To do so, I am going to open my Portal Management app and search for this web page.


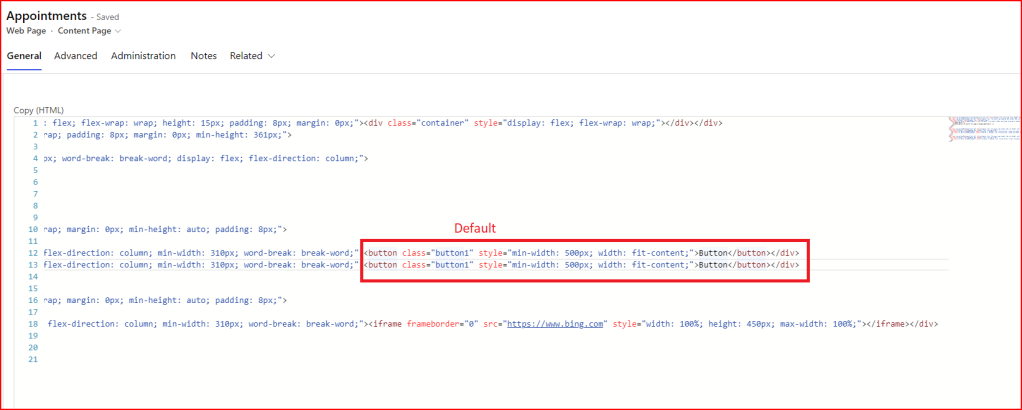

For the iframe tag, I have added the id and removed the value from src as this value will be updated based on the button clicked.


Go to Advanced tab and copy-paste the below code in the Custom Javascript section.
$(document).ready(function(){
    $("#myAppointments").bind("click", function() {window.open("https://myhospital.powerappsportals.com/Appointments/?screen=Dashboard","_self");});
    $("#bookAppointment").bind("click", function () {window.open("https://myhospital.powerappsportals.com/Appointments/?screen=BookAppointment","_self");});
});
$(document).ready(function(){
    const queryString = window.location.search;
    const urlParams = new URLSearchParams(queryString);
    var ifrm = document.getElementById("iframecomp");
    ifrm.src = "https://apps.powerapps.com/play/{You can get this URL from App details}?tenantId={tenant ID}?source=website&screen=" + urlParams.get('screen');

});

line 2-3: I am creating the query string (screen=Dashboard or screen=BookAppointment) which will be used later to identify the screen to be loaded
line 6: I am fetching the query string included in the URL.
line 7: this will help us manipulate all the parameters included in the query string
line 8: this will get the iframe component which we added in the web page using the id.
line 9: ifrm.src = “https://apps.powerapps.com/play/{You can get this URL from App details}?tenantId={tenant ID}?source=website&screen=” + urlParams.get(‘screen’);
we are setting the src property of the iframe component which we left empty earlier.
The URL contains the link to the published version of the canvas app along with the parameter.
Save and Close the changes.
Update the Canvas app StartScreen Property
Add the below code in the StartScreen property
Switch(Param("screen"),
 	"Dashboard",'Dashboard Screen',
 	"BookAppointment",'Book Appointment')

Save and Publish the app.
Moment of truth
I have opened my Power Pages application and opened the Appointments page which we have created.

Bonus: How to Get the app URL

Thank you for sticking till the end. Hope you enjoyed the post and found it helpful. Please share your thoughts in the comments.

Leave a comment