
Hello Power Addicts, hope all of you have been doing fine and welcome back to another blog post.
Recently we have seen the Express Design introduced in PowerApps during the MS Build 2022 event. With this, we can now convert our sketches/images of our ideas immediately into a canvas app. So today in this blog, I will be showing how we can get started with using this preview feature and convert a sample image created in Paint to a full fledged canvas app using the Express Design.
- First of all, I will create the sample sketch of a sign up form using PAINT and save it as SignUpform.jpg.

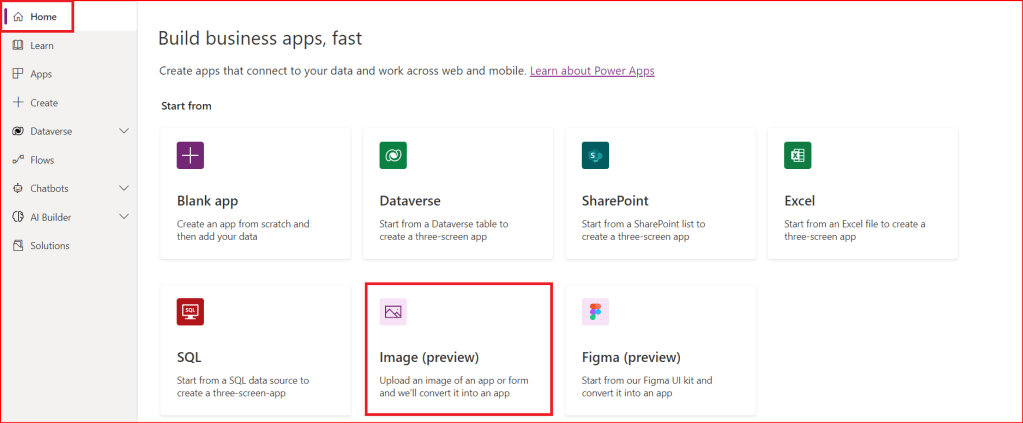
- Go to the powerapps portal.
- From the Home navigation menu, select Image (preview).
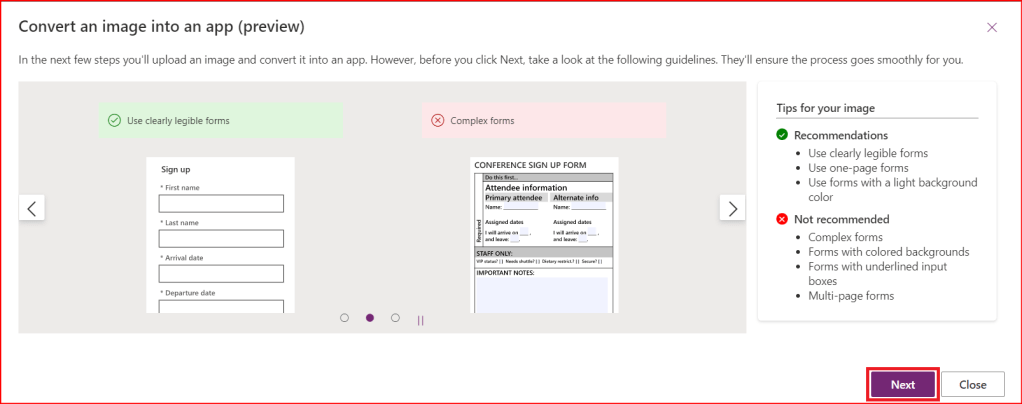
- Go through the guidelines and click Next.
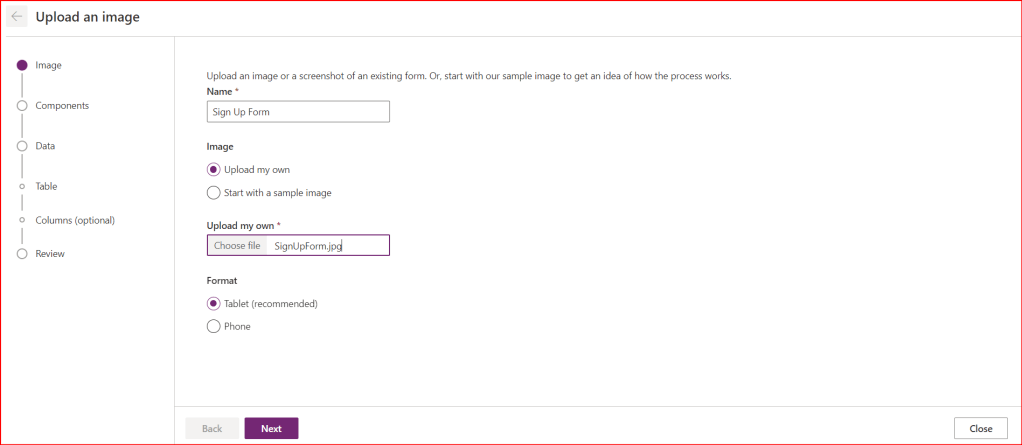
- Under Image, I will select Upload my own option and upload the image which I have just created.
I will select Tablet as the form factor of the app I am creating. Click Next.
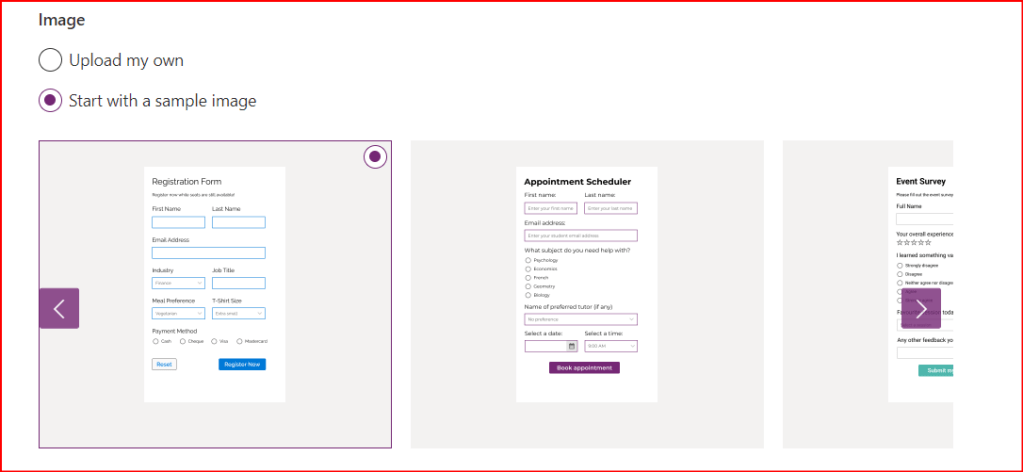
Note: You can also select Start with a sample image and check out various sample images included in the wizard shown below.
- In this step, we will find that all the fields in our image are already tagged or mapped to Canvas app components as detected by PowerApps. To see the default mapping done by the wizard, hover to any component and you will find the component “tagged as”. For example, Username in my image is by default Tagged as text label.

In case you want to change a component to some other, you can do so by clicking on it and select the appropriate component from the list as shown below.

We could continue hovering on each field and check the component type. But we would want to save ourselves some time. And this wizard can help us with it. Take a look at the below image.

We can see a list on the right hand under Tags applied and it is an overview of which fields from the image are tagged as which app component. For example, in my case, all the fields which are converted to Text Input component types are tagged as Text input and highlighted by a Green color border. Similarly, all the Text labels are the ones in Orange color and the Submit button is also present, highlighted by the Purple color.
Lets take a closer look. The City and the State fields are supposed to be converted to ComboBox but they have been actually converted to Text Input components only. So we will change it to ComboBox (see how to do it in the above step) and now we can see that a new tag has been added under the Tags applied.

- Once the correct mapping has been completed, click on Next.
Here we will be able to set up the Data for our app. Either, we can create a new table in Dataverse or skip it to be created later on.

We will create a new table in Dataverse. So, I will select this option and click on Next. (If we choose to skip, we will get the option to create the app in the next step)
By default, we can see that under Columns Applied, all the assigned fields and Data Types are shown.
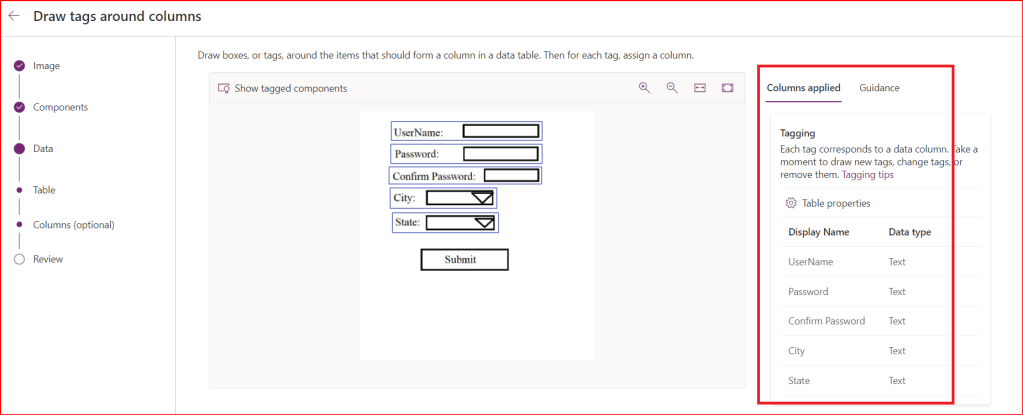
We can change the data type for any of these fields by selecting the component in the designer and choose the correct data type.


Once the mapping has been done correctly as per our requirement, click on Next and we will land on the Review screen. Make any other changes on this screen like the table name. If everything is fine, click on Create.
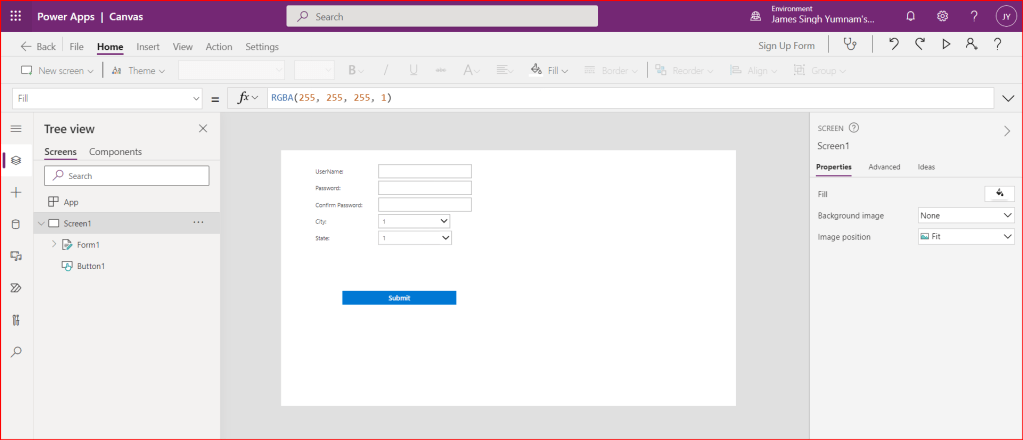
In no time, our app will be spun up by PowerApps and loaded into the canvas studio.
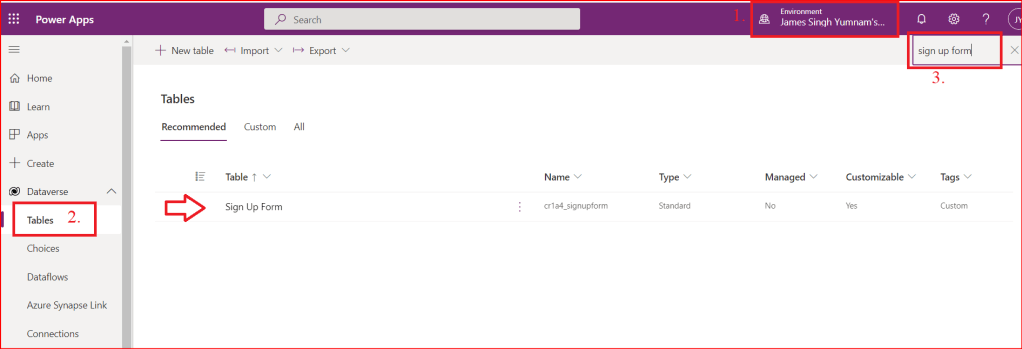
Lets check if the table has been created or not. Open the Tables in the environment where the app has been created.
At this point, won’t it be really nice if we can play the app and be able to insert some data into the table? Let’s go check this out too.
I have played the app and entered the below data:

In the table, we can now also see the data being saved. Great!

Well this is it! I have just shown you how to get started with the preview feature of converting an image to a full fledged canvas app.
Let me know your thoughts in the comment section. 🙂
Thank you for sticking by and see you in the next blog.

Leave a comment