
Hello Power Users. Hope you guys are doing great. In this blog, I am going to show how we can execute the cmdlets available in PowerShell for PowerApps module by the admins or app makers and use the script output in PowerApps.
For demo purpose I will show the use of one simple cmdlet Get-AdminPowerApp, which will return a list of all Power Apps and their information across the tenant. This cmdlet is available in the Administrator module.
Table of Contents
- Pre-requisites
- Setting up Azure Automation Account
- Add Credentials
- Setting up PowerShell Runbook
- Integrating the Azure Runbook with Power Automate
- Working with the response in PowerApps
Pre-requisites
- An active Azure Subscription
- I am also using Premium Connectors in Power Automate flow to connect to the Azure Automation account, so we need Power Automate Premium license.
- Understanding of the PowerShell module for PowerApps
Setting up Azure Automation Account
- Log into https://portal.azure.com
- Search for Automation Account

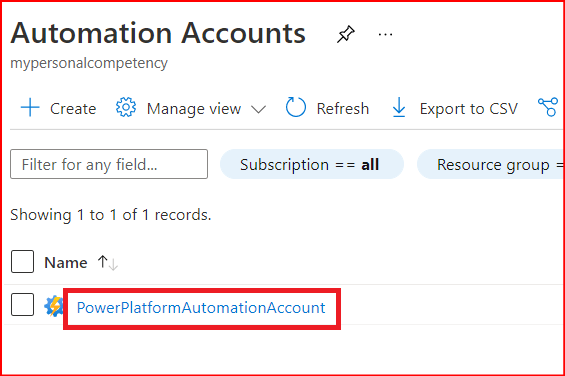
- Create a new automation account.

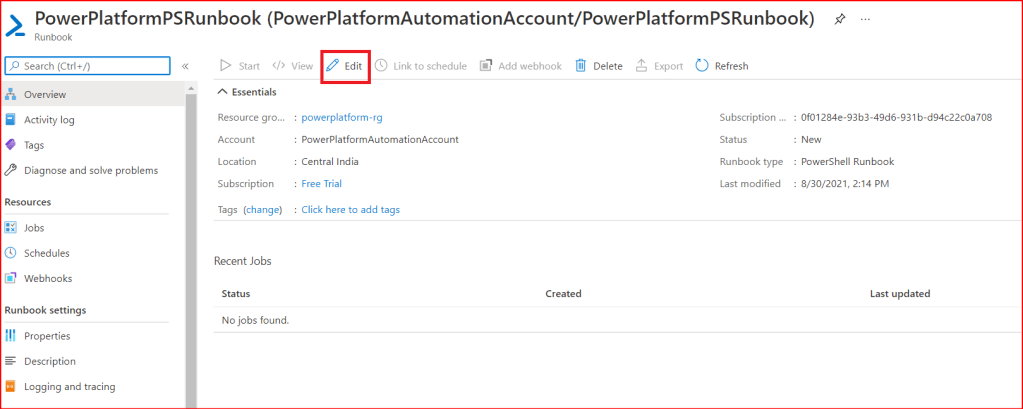
- Once created, select the newly created Automation account (step 1 in below screenshot).
- Under Shared Resources, select Modules gallery(step 2 below screenshot). This will give you a marketplace where you can find all the modules available to be used in your runbooks.
- In the search box(step 3 below screenshot), type powerapps and from the search results, select Microsoft.PowerApps.Administration.PowerShell(step 4.a below screenshot).

- Upon selection, it will open a new window display detailed information about this module including its description and the list of functions.
- Click on Import. Then Ok.

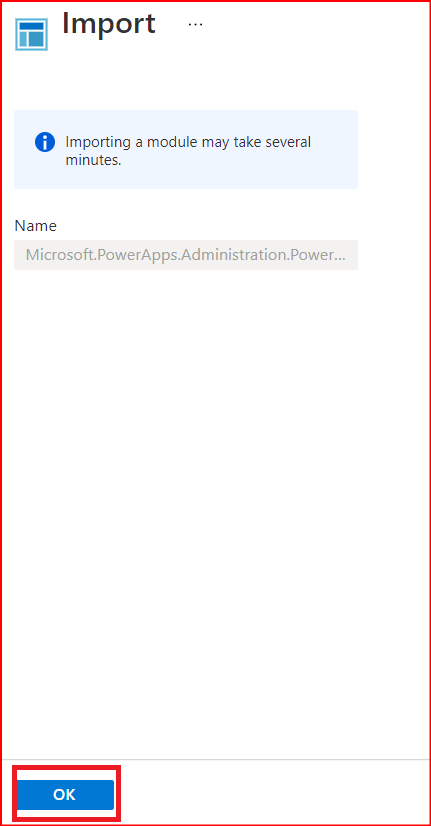
- Wait for the module to be successfully imported.
Note: Repeat the steps to add the other modules as well as per your requirement.
Add Credentials
- Go to the Automation Account and under Shared Resources, select Credentials and click on Add a Credential.
- Fill the details with your PowerApps Account.

In my case I have created PowerLearn Credentials.
Setting up PowerShell Runbook
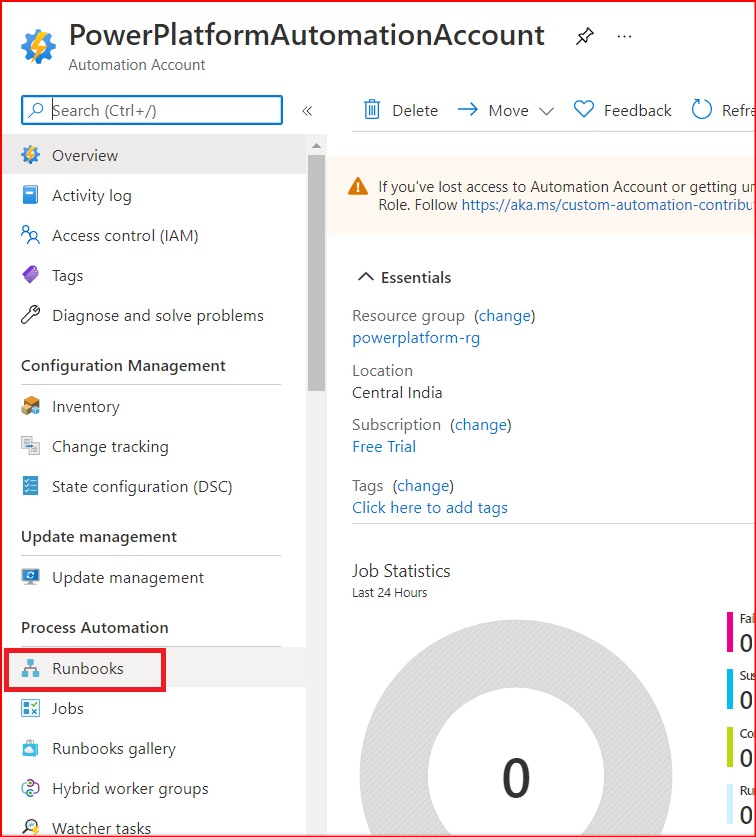
- Select the newly created Automation account.
- Select Runbooks.
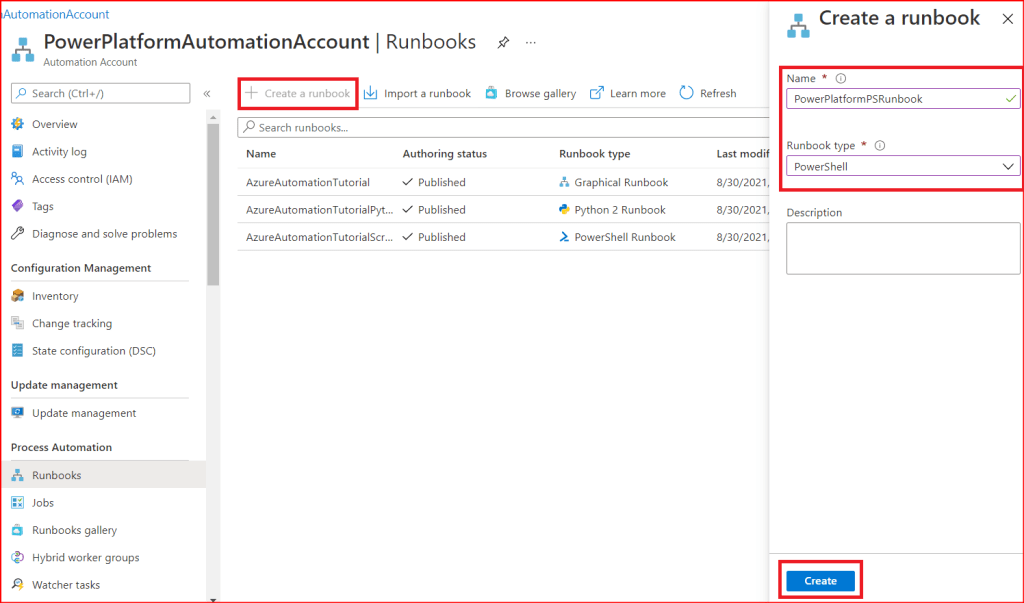
- Click on Create a runbook.
- Give a Name of your choice and make sure to select Runbook type as PowerShell
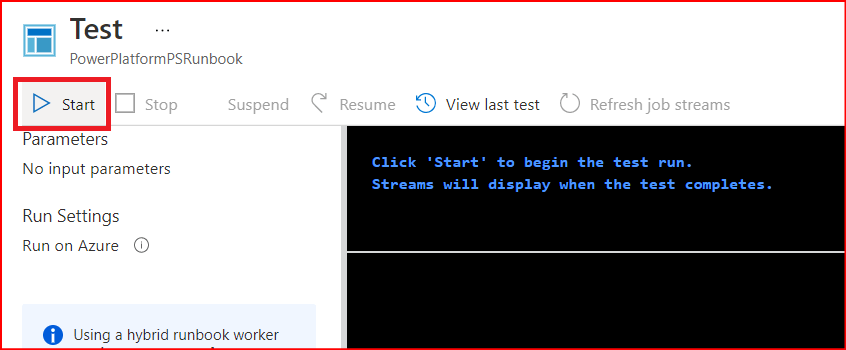
- Select the newly created Runbook and it will open a new window.
- Click on Edit.
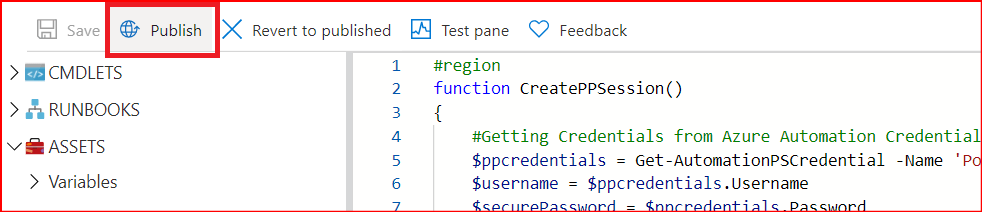
- Paste the below PS script in the Editor pane
#region
function CreatePPSession()
{
    #Getting Credentials from Azure Automation Credentials
    $ppcredentials = Get-AutomationPSCredential -Name 'PowerLearn Credentials'
    $username = $ppcredentials.Username
    $securePassword = $ppcredentials.Password
    try{
        Add-PowerAppsAccount -Username $username -Password $securePassword
    }
    catch{
        Write-Output $_
    }
}
#Main Code
CreatePPSession
Write-Output "PSOutputStart"
Write-Output (Get-AdminPowerApp | ConvertTo-Json)
Write-Output "PSOutputEnd"
Note: On the left hand side of the editor, you can find the credentials you have created above and use the Add to canvas option from the ellipse, which will automatically add the required cmdlet to import that credential.

To Test this runbook, click on Test pane and click on Start.

Once you are happy with the output of the script, Publish the runbook.
Now the runbook is ready to be consumed by Power Automate flow.
Integrating the Azure Runbook with Power Automate
- Create an instant cloud flow with actions as shown below:


Expressions used:
| Action Name | Expressions used |
|---|---|
| Json Start Position | add(indexOf(body(‘Get_job_output’),’PSOutputStart’),13) |
| Json End Position | sub(indexOf(body(‘Get_job_output’),’PSOutputEnd’),1) |
| Get Json Data | substring(body(‘Get_job_output’),outputs(‘Json_Start_Position’),sub(outputs(‘Json_End_Position’),outputs(‘Json_Start_Position’))) |
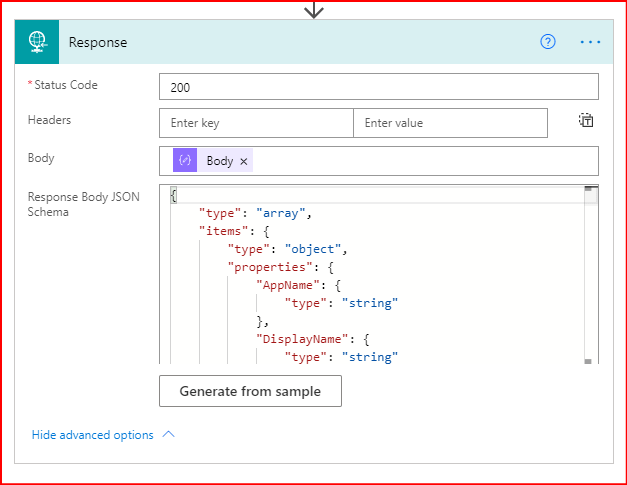
For the Schema and Response Body Json Schema used in Parse Json and Response actions respectively, I have generated it using Generate from Sample. And the data is taken from the output of the Get Job Output action from a previously run instance of this flow before Parse Json and Reponse actions are added. Copy the result from Content in Get job output action and paste it in the pop up window of Generate from Sample. Then the schema will be generated.
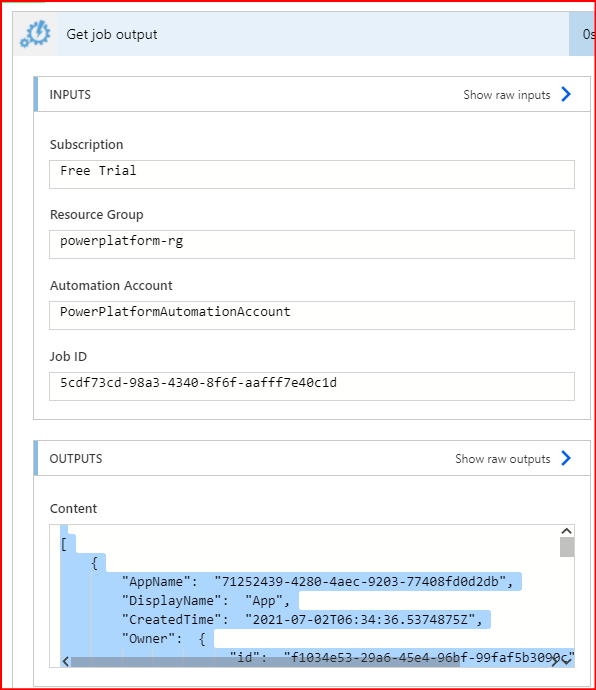
Once the flow is created, Test it to check if you are getting the JSON result in the Outputs of Response Action.

With this our flow is also ready and we need to call it from our PowerApps.
Working with the response in PowerApps
- Go to https://make.powerapps.com
- Create a tablet layout PowerApps Canvas App and add the controls as shown in 1. Controls in below image.
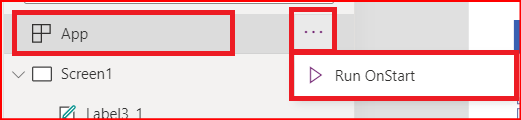
- In the App OnStart(), add the code as shown in 2.b.
- Run the code in App OnStart().
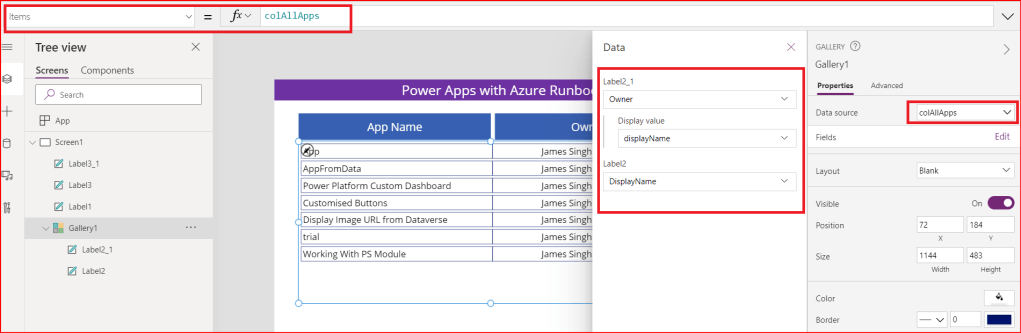
This calls the Flow and stores the response in our collection colAllApps.

- Set the following properties of the gallery:
- Datasource: colAllApps
- Items: colAllApps
- Map the correct fields whose values you want to display in the labels inside gallery. In my case, I am going to display the app name and its owner.
This now completes the whole process of setting up the Azure Automation account, Azure Runbook for PowerShell for PowerApps, Power Automate flow and PowerApps Canvas app.

This is just the beginning where I have shown how a particular cmdlet in one of the available modules can be used.
Thank you for your patience and sticking till the end of the post. Hope you find it helpful.
See you in my next blog.

Leave a comment