
In this blog, I am going to show how we can perform the CRUD operations on our data using Gallery and Forms in a PowerApps Canvas App.
Table of Contents
Set Up
- DataSource used is an entity named My Sample Data which has been created in Microsoft Dataverse.
Let’s Begin
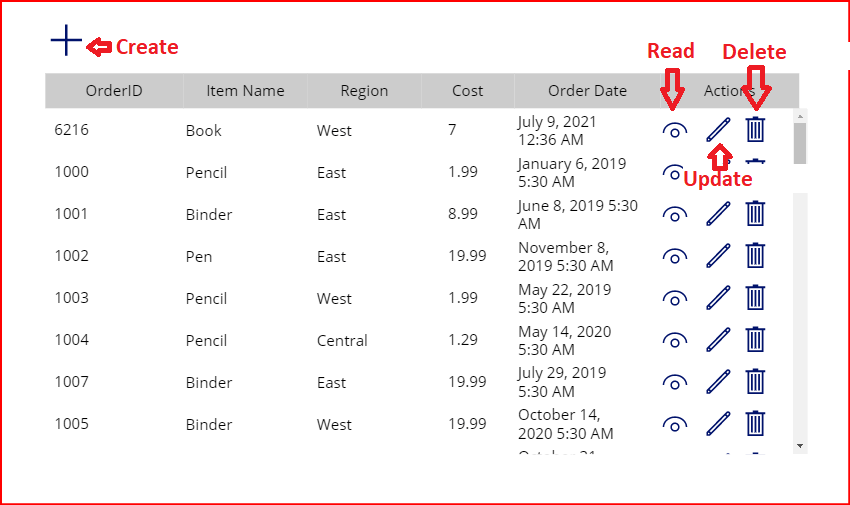
I will start with creating the Home screen using the following controls:
- Blank Vertical Gallery
This gallery is connected to the table “My Sample Data”. It has labels to display the records and icons to perform Read/View, Update, and Delete.

Create a new record
First I will create a form with which I will submit the new record.
To do this I have added a new screen called “CreateScreen” and I have added an Edit Form in it along with a Button called Submit Button which is outside the form area.
The below screenshot shows the screen I have just created:

- Now the edit form design is completed and I will add the following code in OnSelect property of the + icon which will help in navigating to the CreateScreen.
NewForm(Form1);Navigate(CreateScreen, ScreenTransition.None)
- In the CreateScreen, in OnSelect property of the Submit button, I will add the below code to submit any data which have been filled in the form. The data will be saved in the table.
SubmitForm(Form1);
Read a record
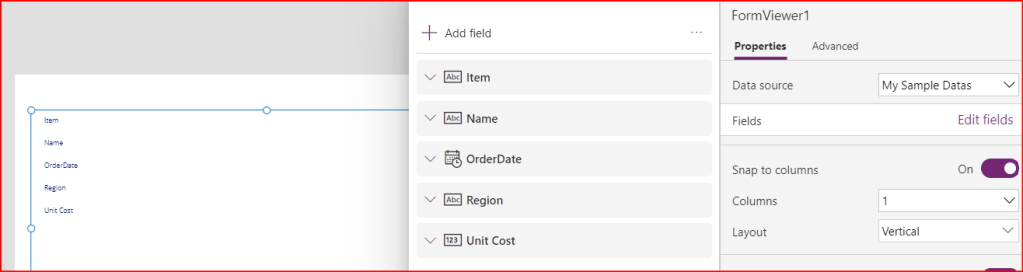
In order to display any selected record from the gallery, I will create another screen called DetailsScreen and use a Display Form to display the selected item.
So, the display form looks like below after connecting it the datasource and adding the fields which I want to display as View Text control types:
Now that I have the form ready to display the selected record from the gallery, let’s add code to make this happen.
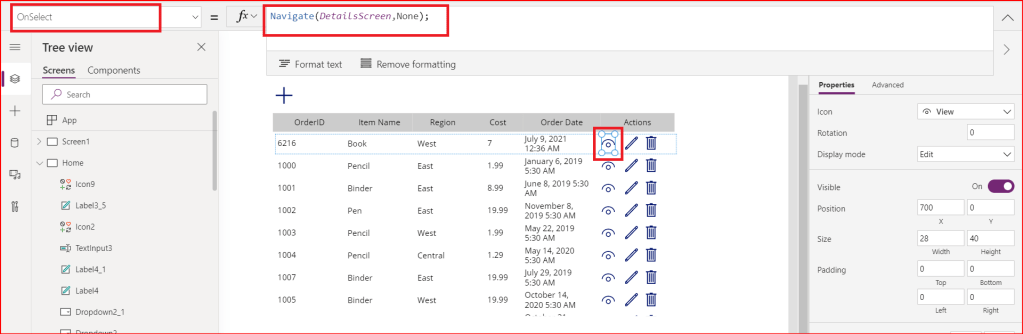
In the Home screen, inside the gallery, on the OnSelect property of View Icon, I will add the following code:
Navigate(DetailsScreen,ScreenTransition.None);
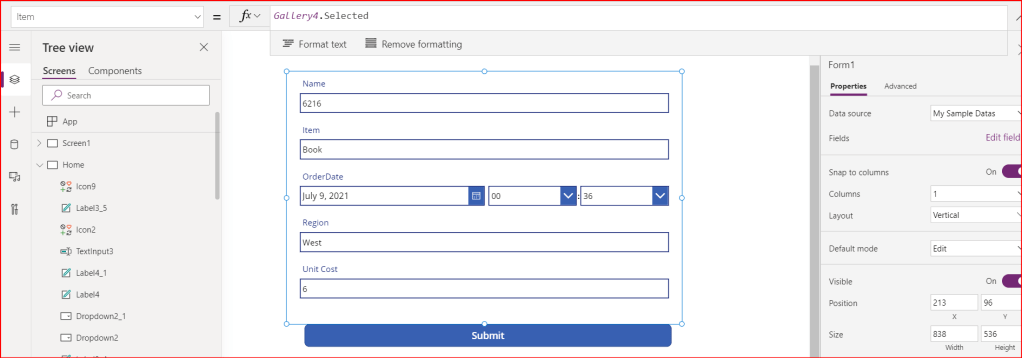
Now, to display the selected item in the DetailsScreen form, I will set the Item property of the display form to Gallery4.Selected, where Gallery4 is the gallery name in the Home Screen:

With this, when we click on View icon in any row inside the gallery, it will take us to the DetailsScreen and display the record which we have selected.
Update a record
Inorder to update a record, I am going to use the same Edit form in the CreateScreen. To populate the fields with the required values for the selected item, I am going to set the Item property of the form to Gallery4.Selected.
And in the OnSelect property of the Edit icon in the gallery, I will add this code to instruct that Edit mode of the form should be opened. This way, the form will be pre-filled with the values of the selected item.

With this, when I click on Edit icon of any item in the gallery, it will open the Edit form and upon clicking Submit button, the record will get updated.
Delete a record
Inorder to delete a record, I have added a Trash icon inside the gallery and add the below code on its OnSelect property:
Remove('My Sample Datas',ThisItem)

This will remove the data from the gallery and also from the datasource.
Demo: CRUD in Action
Let’s watch the below video and see how the app is working:
Hope you find this helpful as you start working and learning PowerApps.
If you would want more content on PowerApps or other Power Platform tools, please subscribe to my blog and comment down below what topics you would want me to come up with next.
See you in the next blog.

Leave a comment