
Hello Power Addicts. Welcome to another blog and today, I will discuss briefly on how we can get started with creating simple context menus as shown below in PowerApps canvas apps.

Let’s begin.
Step 1. Inside a new canvas app, let’s add a Vertical Gallery which will be our context menu and add a label to show the context menu items. I have renamed the controls to gal_contextMenu and lbl_menuItem.

Turn off the Show scrollbar for this gallery.

Step 2. Let’s create a sample collection colMenuItems which will store our context menu items.
In the OnStart property of the App, update it with the below code. (Run the App OnStart to populate the collection.)
ClearCollect(
    colMenuItems,
    {title: "Copy"},
    {title: "Cut"},
    {title: "Edit"},
    {title: "Delete"}
)

Step 3. Update the datsource of the context menu gallery to the collection. Also map the label control with the title field.

Step 4. To maintain the visibility of the context menu gallery, we will use a variable varShowContextMenu which will be set to false on screen OnVisible property.
UpdateContext({varShowContextMenu:false})
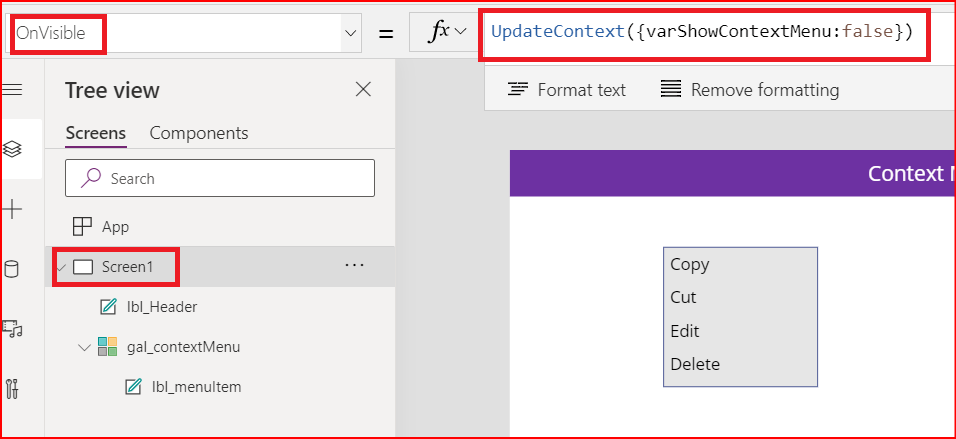
Now set the Visible property of the gallery to this variable.

Step 5. Add another vertical gallery (gal_data in my case). This gallery will contain records and the context menu will be available for each record. I have connected gal_data to a dataverse table I have created.
I will also replace the default NextArrow icon in the gallery with something more suitable like a More icon, on the click of which will open the context menu.

Step 6. I will update the OnSelect property of this More icon with the code to make the context menu appear and disappear.
UpdateContext({varShowContextMenu:!varShowContextMenu});

Note: Bring the context menu gallery to the front so that it remains on top of other controls.
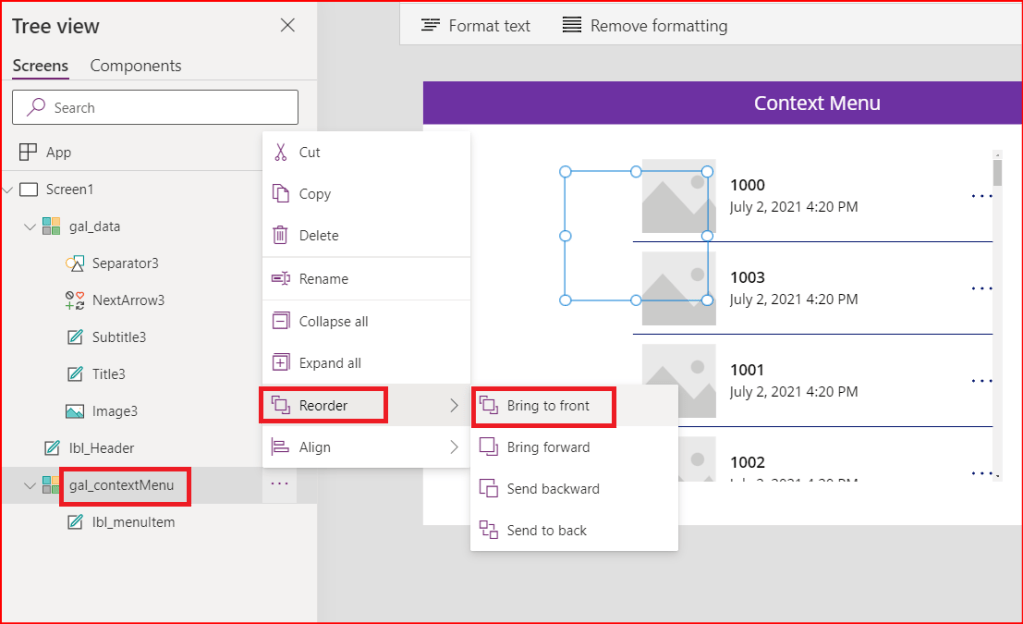
Also drag the context menu gallery and put it somewhere near the more icon and around the center of the gallery, gal_data.

TEST: Play the app and click on the ellipse or More icon. You will now see that the context menu is displayed and hidden accordingly.
Step 7. On the click of each option available in the context menu, some corresponding action has to be performed on the selected row. So, I will update the OnSelect property of the label in context menu gallery with the following code.
For demo, I have only added the code which will delete a selected row when Delete is selected from the context menu. Selection of any othe options from the context menu will only display a notification saying that no action is defined for them.

When we play and run the app, we can now see that the context menu is working as expected.

Extra Step: To make it look better during record selection inside the gallery gal_data, we can add background color to the selected row.
We can achieve it by updating the TemplateFill.

To change the text color for the selected row, select the title and subtitle and update the color code for each as below:

Now our final app will look like below:
Limitation: Currently in PowerApps, we cannot track mouse click coordinates. So, the context menu, although is working for all the records, will appear in the same position for all the records.
Thank you for sticking by. See you in the next post.

Leave a comment